This functionality provides the opportunity to “convert” a book created by the teacher into a template to support and guide the students’ writing process.
When you slide the “Template” button to the right, the books will be shared with your students.
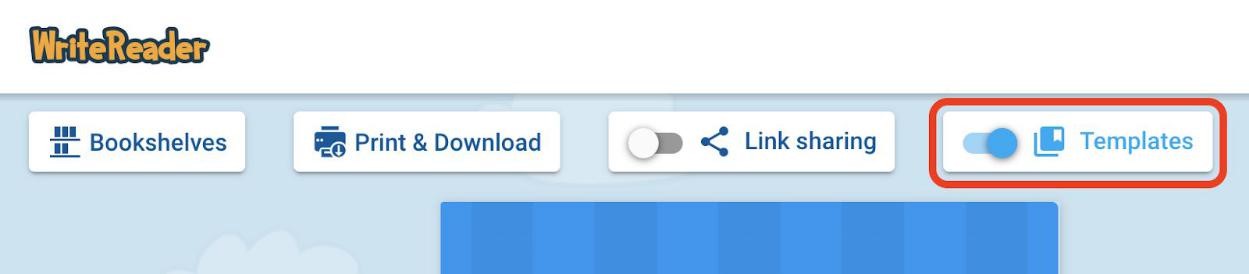
This means that the cover image of the template books (with a frame in the cover color) will appear when the students click the “new book” icon (blue plus sign).
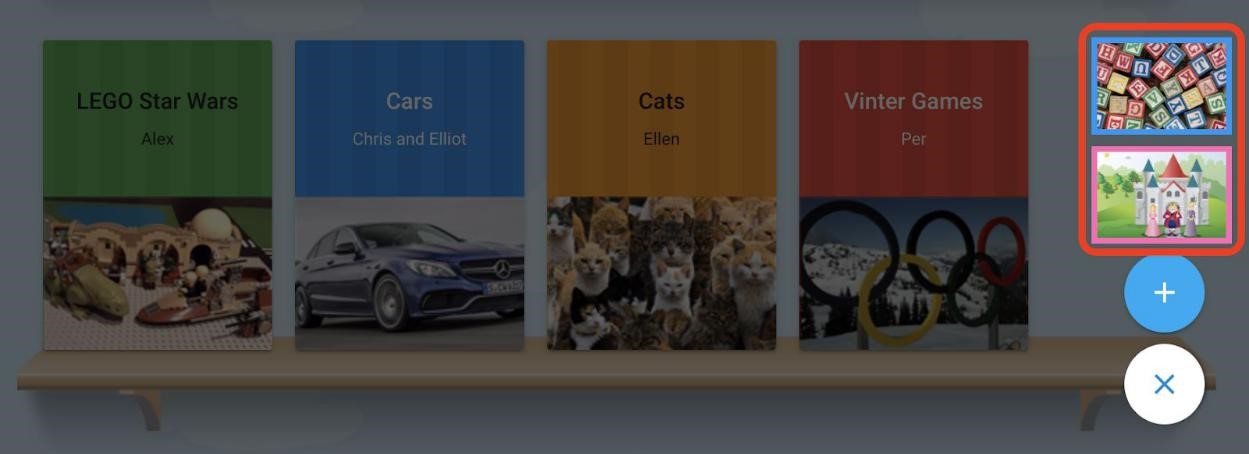
When a student chooses the template book, a copy of the book will be placed on the student’s bookshelf and the student will be able to edit the book like any other book.
When the teacher disables the template feature(slide button to the left), the students will not be able to choose the template again but the copy of the book will still be available on student’s bookshelf. It is recommended to disable template books when they are no longer relevant.
Below you will find ideas and inspiration on how to support students with template books
Images:
Include images that can support story structure for the students (beginning, middle, ending) Include images that are not available for the students on their devices. This could be images of class trips, the school play, etc.
Text:
Insert headings, questions, and story starters which will support the students. It is recommended to use the educator writing field for this.
Create a table of contents on the first page which indicates the structure of the student books. (A page type with only text can be used for this.) For instance, when writing a non-fiction book about pets, a framework could look like this:
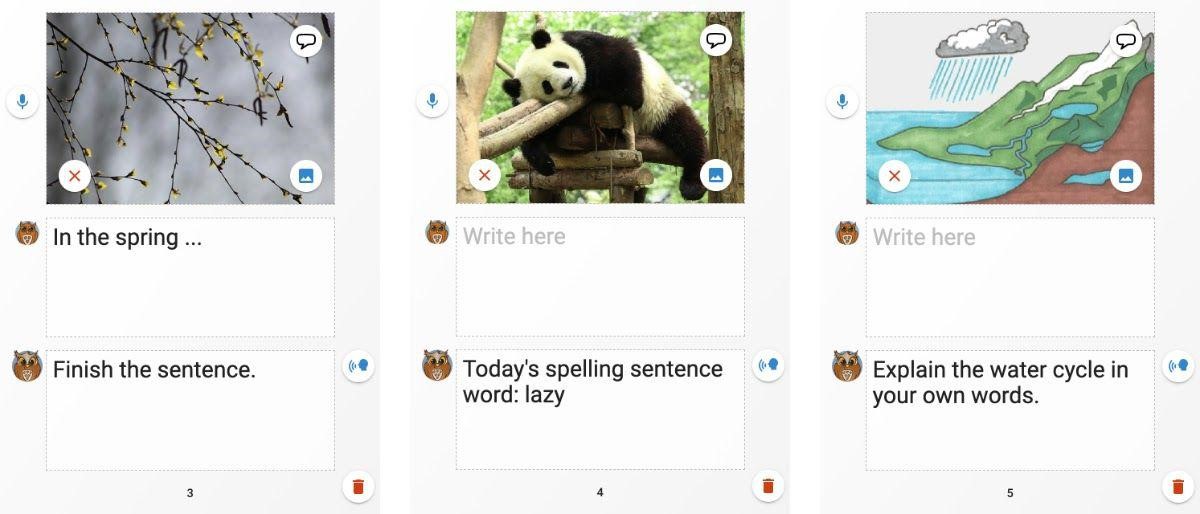
Table of Contents:
Page 3: Appearance
Page 4: Size
Page 5: Food
Page 6: Care
Page 7: Pups
Audio recording:
Record good advice or an encouraging message with information that can support the students’ work. (Note: You have up to 45 seconds of recording per page.)